Tuesday 31 May 2011

Get booking!

I had a lovely card to show you but the picture won't load. You'll probably have noticed that I've not been updating my blog as often as usual lately - and one of the reasons is because Blogger simply isn't playing ball. That and a pretty erratic internet connection at home makes it all very frustrating.

Hopefully text will work so I will use this post to remind anyone who lives near to me to get booking for my classes please!  Coming up, I have my usual Christmas in July, a special free event south of Derby to introduce SU to new crafters and a scrapbooking evening in August. 

Please check out the Events page for more details. Your place is secured on receipt of payment, but please don't leave booking to the last minute as it gives me palpitations!

Sunday 29 May 2011

Another use for the Top Note Die - and the Mother of Pearl technique


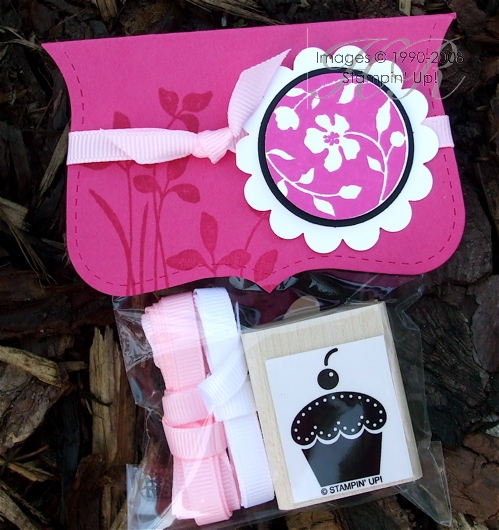
You know how I said you absolutely MUST get the Top Note Die? Well, here’s another reason: easel cards! Here are two easel cards from my May workshops; the first one, with the black, was the demonstration card, and the pink and white one was the Make & Take.

Making easel cards is very easy. All you do is cut your A4 cardstock in half lengthways, so measuring across the short edge at 10.5cm. Then you fold it in half (score at 14.8cm) and then, on one half, score in half again (at 7.4cm). 

There are two things you need to remember with easel cards:

1. The flat base must have something raised on it, to stop the top half of the card sliding down. Here I’ve used a strip of cardstock popped up with Stampin’ Dimensionals. You could also use brads, buttons etc – as long as there’s a “step”. 

2. You need to make sure the top folded piece sits down – my early efforts saw the top piece floating in mid-air. To make it sit down, you can add weight such as buttons etc, but by far the easiest way is to ensure that the score-lines are well creased. The important one is the one at the back, which is the halfway score. Get your bone folder on it and crease it well and you’ll have no problems!

Now, I’m not sure if you can see from the photo but on the first sample there’s a rather groovy technique. It’s called the Mother of Pearl technique and I learned it from Impressions magazine, the monthly newsletter sent by Stampin’ Up!® to all demonstrators.

You will need Whisper White cardstock, Frost White shimmer paint, a pale-coloured ink pad, Black StazOn® ink pad and a piece of cling film scrunched up into a ball.

  1. Put a few drops of shimmer paint onto a paper plate.
  2. Using the scrunched-up clingflim, dab the paint onto your Whisper White cardstock.
  3. Allow to dry.
  4. Once dry, you can add coloured ink either by sponging or brayering (brayering is quicker, but sponging will allow you more precision if doing lots of different colours). I brayered Pink Pirouette ink over the top for a really gentle effect.
  5. Now you can stamp on this very cool background – but you must use StazOn® ink because ordinary ink pads won’t work on what is now a non-porous surface. 
Have fun!

Stamps: Just Believe, Something to Celebrate (hostess set)
Cardstock: Whisper White, Basic Black, Melon Mambo, Pink Pirouette
Ink: Pink Pirouette, Melon Mambo, Black StazOn®
Accessories: Frost White shimmer paint, brayer, Itty Bitty Punches, Top Note Die, Scallop Edge Punch, Basic Pearls, Big Designer Buttons, 1/8” taffeta - Basic Black

All products by Stampin’ Up!®            

Thursday 26 May 2011

Something borrowed, something blue


Another wedding, another card... but I have to say I don’t like this one as much as the Melon Mambo one I made earlier.  I was completely thrown by the fact that I had no Baja Breeze cardstock left... must have used it all up at my Mini catalogue launch. So I compromised with a combo of Marina Mist, Basic Gray and Whisper White.

There's nothing old on this card, it's all new - stamps, embossing folder, die, ribbon are all from the new Mini. Something borrowed? Yes, the flower die belongs to my lovely downline, Kelly. And something blue is self-evident!

Stamps: Something to Celebrate (hostess set)
Cardstock: Marina Mist, Basic Gray, Whisper White, Vellum cardstock
Ink: Baja Breeze
Accessories: Seam Binding ribbon – Baja Breeze, Big Shot, Elegant Bouquet Embossing folder, Fun Flowers die, Neutrals buttons, Whisper White taffeta ribbon

All products by Stampin’ Up!®

Sunday 22 May 2011

Nature scrapbook


Oops, forgot to post this after the scrap class, but here’s a double-page spread which caused a little consternation! Apparently the class-goers were not that keen on double-page spreads. It’s a steep learning curve for me!

I love the look of the Broadsheet Alphabet on this layout. I stamped it at random so that I didn’t have to sweat about it too much and used different coloured inks. I chose the clear-mount version of this stamp set which made positioning the letters really easy!

The flower detail is fun. I used the Fun Flowers Big Shot die and had prepared the Very Vanilla and Early Espresso layers in advance. The largest flower, however, was made from the backing card you get in a pack of Designer Series Paper, which we covered with Designer Series Paper. I’ve found that if you stick it down with Tombow adhesive before running it through the Big Shot, it gives a really nice result – much nicer than die-cutting them separately and sticking them together afterwards.

The button is simply a piece of Designer Series paper stuck to a scrap of cardstock and punched out with the ¾” circle punch. You could also do it in the Big Show as there are flower centres in the Fun Flowers die. Two holes were punched with the Crop-A-Dile™ and some linen thread tied through to represent a button.

Stamps: Broadsheet Alphabet, Growing Green
Cardstock: Wild Wasabi, Early Espresso, Very Vanilla,
Paper: Woodland Walk
Ink: Crumb Cake, Garden Green, Wild Wasabi
Accessories: ¾” circle punch, Crop-A-Dile™, Big Shot, Fun Flowers die, corner rounder, linen thread

All products by Stampin’ Up!®

Thursday 19 May 2011

Top Note topper

If you have the Big Shot, or a similar machine, you absolutely must get the Top Note Die!  It’s exclusive to Stampin’ Up!® so you won’t find it anywhere other than in our gorgeous Mini catalogue. And you won't regret it, honest! 

I admit I overlooked this to begin with but there are loads and LOADS of things you can do with it. I’ll be showing you some of them over the next week or so, starting with this really simple idea to create a topper. Straight lines will look soooo boring from now on!

But first, back to the die. It measures 14cm x 15.2cm, but obviously it cuts a shape a little smaller than that. As well as the outline, it cuts lovely a little dotted inline, too, rather like stitching. It’s very cool.  The Big Shot is a mighty machine which will cut more than one sheet of cardstock at a time. For simple shapes I have cut four sheets, but with the Top Note die, you will lose the dotted line. I found two sheets was the maximum, and even then, the dotted line was not as pronounced on the bottom sheet. Just so you know!

When you’ve die-cut your Top Note, you can use it on cards and scrapbook pages but you can also use it to make 3D items, it’s a very versatile shape.  I’ve even used it to make a mini album, binding together several Top Notes to create pages. More on that another time (ie, I’ve not finished it yet!).

At my workshops (home parties) I always hold a prize draw with a small stamping prize. This was one of this month’s – just a stamp and some ribbon but enough to make somebody’s day.

The topper is simply the Top Note, scored down the centre and folded in half. Tape a cello bag inside and then you can decorate the outside to suit. I went for the old favourite combo of  the 1 1/8” and 1 ¼” circle punches, teamed with the Scallop Circle Punch – it’s a classic combination which you’ll never tire of.  The stamps are from Just Believe, which is a beautiful stamp set – one of our larger ones but well worth the investment.

Stamps: Just Believe
Cardstock: Melon Mambo, Basic Black, Whisper White
Ink: Melon Mambo
Accessories: Big Shot, Top Note Die, 1 1/8” circle punc, 1 ¼” circle punch, Scallop Circle Punch, ¼” Grosgrain Ribbon - Pretty in Pink, small cello bag

All products by Stampin' Up!®

Tuesday 17 May 2011

Eggs!

This card is one of those times when you copy something you’ve seen on the internet and it doesn’t turn out as nice as the original.  I wish I’d stamped more images on the Old Olive panel but once I’d run it through the crimper it was too late.  I suppose I could have “ironed” it out in the Big Shot but I’ve only just thought of that!

I coloured the eggs with a blender pen and Baja Breeze ink pad, with some Sahara Sand around the base for shading.  This panel is also distressed using the flat stamp from the Distressing Essentials Kit and some Sahara Sand and Early Espresso ink.

Stamps: Nature Walk, Party This Way
Cardstock: Sahara Sand, Old Olive, Early Espresso, Very Vanilla
Ink: Early Espresso, Baja Breeze, Sahara Sand
Accessories: Paper Crimper, ¼” Grosgrain Ribbon – Old Olive

All products by Stampin’ Up!®

Sunday 15 May 2011

Variations on a theme

Sorry for the absence of posts. Blogger went down on Friday and Saturday was just too busy to blog.

To make up for it, I have two for the price of one today! The first card is one I made earlier, but wasn’t 100% happy with. The second is a variation on the theme and one of the cards I demonstrated at my Mini Catalogue launch recently.

I wanted to show people how they could use their clear blocks to create a cool background panel. It’s very easy – you just use the block directly on the ink pad and then stamp. For the Sahara Sand panel I also added a bit of Early Espresso around the edges, using the “rocking and rolling” technique – ie, I just inked the edges of the block on top of the Sahara Sand. For the Baja Breeze panel, I stamped off onto my grid paper twice before stamping on the cardstock. This gave a nice subtle colour.

Next I masked off the bottom and right edges with a sticky note and stamped the sprig. I removed the mask and stamped the bird, deliberately positioning it off the edge of the cardstock.

For the second sample, I ruffled the ribbon – this is so easy with seam binding. You find a centre strand from a frayed end and pull. That’s all!

Stamps: Nature Walk, Just Believe (first sample), Basic Phrases (second sample)
Cardstock: Sahara Sand, Early Espresso, Very Vanilla
Ink: Sahara Sand, Baja Breeze, Old Olive
Accessories: Clear block, Seam-Binding ribbon – Baja Breeze, 5/8” Grosgrain Ribbon – Old Olive,
           
All products by Stampin’ Up!®           

Wednesday 11 May 2011

Fund-raising all-dayer!


I’m excited to announce a special crafting event – my first all-dayer and my first charity fund-raiser!

We’ll be using the Strength & Hope stamp set and everyone who comes along will get their own set to keep. For every set purchased, Stampin’ Up!® is donating £1 to the Breast Cancer Research Foundation, which funds research worldwide. There’s more about the Strength & Hope campaign – and a message from CEO Shelli Gardner – on the Stampin’ Up! website, here.

In addition, £5 of your class fee will be donated to Cancer Research UK.  There will also be a fund-raising raffle with crafty prizes!

That’s the fund-raising bit... what about the crafty bit?

We’ll be making 10 cards (two each of five designs) during the day. Eight will be using the Strength & Hope stamp set and two will be masculine cards for the men in your life.

Drinks and cakes will be served but please bring a packed lunch or make alternative arrangements during the break (eg, go to the chippy!).

The class will be at my usual Derbyshire venue on Saturday, 18th June, 10am-4pm. The cost is £30 if you choose the clear-mount stamp set; £33 if you opt for wood-mounted.

Please book for this event as soon as possible as this particular stamp set is sure to be popular and I’d hate for us to be short on the day. Please send me an email for more details. I do hope you can come along – let’s see how much we can raise together for this worthwhile cause!


Tuesday 10 May 2011

More hopeful thoughts...


Sigh... yet another sympathy card, but another chance to use Hopeful Thoughts. It’s really come into its own this spring. I inked the stamp with markers so I could get the flowers a different colour to the stems.

Stamps: Hopeful Thoughts
Cardstock: Not Quite Navy, Rose Red, Old Olive
Ink: Rose Red, Old Olive (markers)
Accessories: Scallop Edge Punch

All products by Stampin’ Up!®            

Friday 6 May 2011

More woodland scrapping


Another of the pages we created at the Woodland Walk scrapbooking class. This one has hidden journaling – we popped up the large panel of photographs, carefully positioning the dimensionals so that the Crumb Cake tag would slide in and out easily.

I've not had much of a response to my offer of scrapbooking classes. Does this mean nobody's interested? Or just that nobody's got round to telling me they're interested?

Stamps: Just Perfect Alphabet, Growing Green
Cardstock: Wild Wasabi textured, Chocolate Chip, Crumb Cake, Very Vanilla, Garden Green
Paper: Woodland Walk
Ink: Early Espresso, Crumb Cake, Garden Green, Wild Wasabi
Accessories: corner rounder, ¾” circle punch, scallop edge punch, Beautiful Wings embosslit, Big Shot, linen thread

All products by Stampin’ Up!®

Wednesday 4 May 2011

Get well butterflies


I didn’t have much time to rustle this card up as it was for someone who was due to attend my scrapbooking class but couldn’t make it at the last minute as she was in hospital. Thankfully, she is home now and hopefully won’t have to return.

The card introduces my new Square Lattice embossing folder – I can see this one is going to be very useful indeed.  All these colours are from the Brights Collection – they’re so lovely and a little gentler than the old Bold Brights, in pre-Colour Renovation days.

Stamps: Just Believe, Hopeful Thoughts (inside)
Cardstock: Daffodil Delight, Old Olive, Tempting Turquoise, Pacific Point, Whisper White
Ink: Pacific Point
Accessories: Modern Label punch, ¼” Grosgrain Ribbon – Old Olive, Big Shot, Beautiful Wings Embosslit die, Square Lattice embossing folder

All products by Stampin’ Up!®            

Sunday 1 May 2011

Funky flowers


Happy May! The finest month of all, in my opinion...

So... this card is more what I had in mind for the anniversary card I posted on the 22nd April but it just didn’t go that way. A fun and funky card for a friend at work, with lots of texture and some Newsprint because I love it and it seemed appropriate!  I found the colour combination on the Colour Coach... but added some Crumb Cake as a neutral base.

Cardstock: Crumb Cake, Old Olive, Elegant Eggplant, Melon Mambo
Paper: Newsprint
Accessories: Big Shot, Elegant Bouquet embossing folder, Fun Flowers die, old button, spiral punch, 1/8” taffeta ribbon - Basic Black

All products by Stampin’ Up!®

The small print

This is my personal blog and my sole responsibility as an Independent Stampin' Up!® demonstrator. All images are © Stampin' Up!® All content including photographs, projects and text are © Helen Read, unless otherwise stated. Please feel free to copy my ideas for your personal use and inspiration - if you are a SU demonstrator you may use these ideas for your events but please give credit where it is due. Please do not use my ideas for monetary gain, competitions or publication. The images on this blog - including blog buttons - should not be copied and used elsewhere on the internet or on CDs.